Have you ever wanted to create your very own dream card deck for interpretation? Imagining a deck that is perfect for you and allows you to connect with your intuition and artistic expression? If so, you’re in luck! In this article, we will guide you through the step-by-step process of creating your own dream card deck that will enable you to personalize and connect with the cards on a deeper level. From defining your theme and adding symbolism to selecting colors and enhancing the cards, we will cover everything you need to know. So, let your creativity flow and get ready to embark on a journey of self-expression and interpretation like no other!
Contents
- Benefits of Creating Your Own Dream Card Deck
- Step-by-Step Guide to Creating Your Dream Card Deck
- Using Your Dream Card Deck for Interpretation
- Tips and Tricks for a Successful Experience
- Conclusion
-
Frequently Asked Questions
- 1. Can I use any type of cards for creating my dream card deck?
- 2. How many cards should I include in my dream card deck?
- 3. Do I need to be an artist to create my own dream card deck?
- 4. How do I choose a theme or concept for my dream card deck?
- 5. What art supplies do I need to create my dream card deck?
- 6. How can I add symbolism and meaning to my dream card deck?
- 7. Can I use digital tools to create my dream card deck?
- 8. How can I protect and enhance my completed dream card deck?
- 9. Can I incorporate my dream card deck into my daily practice?
- 10. How do I interpret the cards in my dream card deck?
- References
Benefits of Creating Your Own Dream Card Deck

Creating your own dream card deck can bring a multitude of benefits and enrich your interpretation experience. Let’s explore some of the key advantages:
- Personalization and Connection: When you create your own dream card deck, you have the opportunity to infuse it with your own personal energy and intentions. This deepens your connection to the cards, making them a reflection of your inner self. As a result, your interpretations become more meaningful and authentic.
- Artistic Expression and Creativity: Designing your own dream card deck allows you to unleash your artistic expression and tap into your creativity. You have the freedom to choose and create visuals and symbols that resonate with you. This artistic process can be a therapeutic and fulfilling experience, giving you a sense of accomplishment.
- Intuition and Symbolism: Every card you design carries a unique symbolism and can be influenced by your intuitive insights. By creating your own dream card deck, you can explore and incorporate symbols that have personal significance to you. This amplifies the intuitive connection between you and the cards, enhancing the depth of your interpretations.
By personalizing your deck, expressing your creativity, and working with symbols that resonate with you, you’ll have a dream card deck that not only reflects your individuality, but also enhances your ability to interpret the cards effectively. Now, let’s delve into the step-by-step guide on how to create your own dream card deck for interpretation.
1. Personalization and Connection
When it comes to creating your dream card deck, personalization and connection are paramount. By infusing your own energy and intentions into the cards, you establish a strong bond that enhances your interpretation experience. Here are a few key aspects to consider:
- Choosing a Theme: Select a theme that resonates with you and reflects your intentions for the deck. It could be based on a specific concept, such as nature, dreams, or personal growth. By aligning the theme with your interests and beliefs, the cards become more personal and meaningful.
- Designing Visuals: Create card designs that evoke a sense of connection and inspiration. You can draw or paint your own illustrations or use collage techniques to incorporate meaningful images. Focus on imagery that speaks to you on a deep level, allowing you to establish a personal connection with each card.
- Setting Intentions: While creating the cards, infuse them with your intentions and desires. You can do this by meditating on each card and imprinting your energy onto the artwork. This process helps establish a personal connection and empowers you as the creator and interpreter of your dream card deck.
- Adding Personal Touches: Consider adding personal elements to the cards that hold significance for you. It could be a specific symbol, a favorite color, or a meaningful quote. These personal touches further deepen your connection to the cards and infuse them with your unique energy.
By focusing on personalization and connection, your dream card deck becomes a powerful tool for self-exploration and interpretation. The cards become an extension of yourself, and as you familiarize yourself with the deck, you’ll develop a deeper understanding of the symbols and their meanings. Keep in mind that personalization and connection are just the first steps; to fully utilize your dream card deck, it’s important to build a strong connection and learn how to interpret the cards effectively. And that’s what we’ll explore in the following sections. If you’re interested in interpreting recurring symbols in dream cards, check out our article on interpreting recurring symbols in dream cards for further insights.
2. Artistic Expression and Creativity
Artistic expression and creativity play a vital role in creating your own dream card deck for interpretation. Here are some key elements to consider:
- Visual Design: Your dream card deck provides a canvas for your artistic expression. Consider the overall aesthetic and style you wish to convey, whether it’s whimsical, mystical, or minimalist. Use colors, shapes, and textures to bring your vision to life.
- Symbolism: Incorporating symbolism into your dream card deck allows you to communicate deeper meanings and messages. Think about the archetypes, elements, and themes that resonate with you. You can use symbols such as animals, plants, or even astrological symbols to add layers of significance to your cards.
- Collage and Mixed Media: Experimenting with different art techniques and materials can add uniqueness and texture to your dream card deck. Consider using collage with magazine cutouts, fabric, poetry, or mixed media techniques like painting, drawing, and digital art to create visually stunning and dynamic cards.
- Customization: One of the perks of creating your own dream card deck is the ability to customize and personalize each card. Incorporate elements that are meaningful to you, such as personal photographs, handwritten messages, or affirmations. These customizations make your deck truly unique and reflective of your journey.
Remember, the creation process itself can be a form of creative meditation, allowing you to tap into your intuition and explore different ways of visually expressing your interpretations. Once your artistic vision is complete, you can move on to the next step of the process: adding symbolism and meaning to your dream card deck.
3. Intuition and Symbolism
When creating your own dream card deck, the element of intuition and symbolism plays a vital role in enhancing your interpretation experience. Here’s how you can leverage these aspects:
- Intuitive Insights: As you design each card, trust your intuition and let it guide you. Pay attention to your initial thoughts and feelings when choosing and sketching the symbols and visuals. Your intuition will naturally gravitate towards what resonates with you on a deep level.
- Personal Symbolism: Infusing your dream card deck with symbols that hold personal significance to you allows for a more personal and nuanced interpretation. Consider incorporating symbols related to your dreams, personal experiences, or spiritual beliefs. This will create a unique card deck tailored to your journey and interpretation style.
- Multiple Interpretations: Each symbol you include in your card design can have multiple interpretations. Embrace this aspect by exploring the various meanings associated with different symbols. This depth of symbolism will add richness and complexity to your card interpretations, enabling you to uncover deeper insights and connections.
By trusting your intuition, incorporating personal symbolism, and embracing the multiple interpretations of symbols, your dream card deck will become a powerful tool for reflection and self-discovery. To further enhance your interpretation skills and explore different techniques, consider checking out our article on Dream Card Interpretation Tips.
Step-by-Step Guide to Creating Your Dream Card Deck
The first step in creating your dream card deck is to define the theme or concept that will guide your card designs. Consider what inspires you and what elements resonate with your interpretation style. Whether it’s nature, mythology, or a specific artistic style, having a clear theme will give your deck a cohesive and meaningful identity. This theme will influence your choice of symbols and imagery for each card, ensuring a consistent and intentional design throughout.
Next, decide how many cards you want in your dream card deck. While traditional tarot decks typically consist of 78 cards, you have the freedom to choose a different number that aligns with your desired interpretation system. It could be fewer cards for a focused and specific approach, or you might prefer a larger deck for more varied and nuanced interpretations. Consider the balance between the number of cards and the depth of symbolism you want to explore.
Gather the necessary art supplies to bring your dream card deck to life. This may include high-quality paper or cardstock, pencils, fine liner pens, markers, watercolors, or any other art mediums you prefer. Ensuring that you have the right supplies on hand will allow you to create your cards with confidence and precision.
Start sketching and designing each card based on your defined theme or concept. Take your time to carefully illustrate the symbols, imagery, and scenes that represent the meaning and energy you want to convey. You can experiment with different layouts, compositions, and styles until you find the designs that resonate with you the most. Don’t hesitate to make revisions and refine your sketches along the way.
Infuse each card with symbolism and meaning that aligns with your interpretation style and personal connection. Consider the traditional associations of each card and how you can incorporate them into your own deck. At the same time, don’t be afraid to introduce new symbols or modify existing ones that hold personal significance. This will enhance the depth and uniqueness of your dream card interpretations.
Decide on a method for coloring your cards, whether it’s using watercolors, markers, colored pencils, or digital art techniques. Choose a coloring style and palette that complements your theme and enhances the overall aesthetic of your card deck. Coloration adds life and vibrancy to your illustrations, making them visually appealing and engaging.
Once you’ve completed your dream card designs, consider laminating or using protective sleeves for each card to ensure their longevity. This will protect them from wear and tear, allowing you to continue using and interpreting them for years to come. Additionally, you can enhance your cards by adding shimmering accents, gold leaf, or other embellishments that add a touch of magic and elegance.
By following this step-by-step guide, you’ll be well on your way to creating a personalized dream card deck that reflects your unique interpretation style and connection to the cards. Now, it’s time to explore how to use your dream card deck for interpretation purposes.
1. Define Your Theme or Concept
Before diving into the creative process, it’s essential to define a theme or concept for your dream card deck. This theme will serve as the foundation for your design and interpretation. Start by considering what resonates with you and what you want your cards to represent. It could be a specific topic, such as nature, dreams, or astrology, or a broader concept like emotions or personal growth.
Take some time to reflect on your own interests, experiences, and beliefs. Consider what aspects of your chosen theme or concept are significant to you. This will help you narrow down the symbols and visuals you want to incorporate into your cards.
If you’re unsure about which theme to choose, think about the goals you have in mind for using your dream card deck. Are you looking for guidance, self-reflection, or inspiration? Let these intentions guide your decision-making process and help you select a theme that aligns with your desired outcomes.
Remember, the theme or concept you choose should be meaningful to you because it will create a cohesive and powerful message throughout your card deck. Once you have your theme defined, you’re ready to move on to the next step: choosing the number of cards for your deck.
2. Choose the Number of Cards
When creating your dream card deck, one of the first decisions you need to make is how many cards you want to include. The number of cards you choose can vary depending on your preferences and the depth of interpretation you desire. It’s important to strike a balance between having enough cards to provide a comprehensive range of symbolism and not overwhelming yourself with too many cards to interpret.
To determine the ideal number of cards for your deck, consider the purpose of your dream card deck and how you plan to use it. Are you using it primarily for personal introspection and dream interpretation, or do you intend to incorporate it into your tarot practice? If you’re using dream cards alongside tarot cards, you might want to ensure that the number of cards in your dream card deck complements the structure of the tarot deck, which typically consists of 78 cards.
On the other hand, if you’re solely focusing on dream interpretation, you have more flexibility in choosing the number of cards. Some individuals prefer a smaller deck of around 20-30 cards, allowing for a more focused and intuitive interpretation process. Others may opt for a larger deck with 50+ cards, providing a broader range of symbolism and potential dream scenarios.
Remember, there is no right or wrong answer when it comes to the number of cards in your dream card deck. It ultimately boils down to what feels right for you and serves your interpretation purposes best. So, take some time to contemplate the desired focus and scope of your deck before moving on to the next step.
Next, we’ll explore the process of gathering art supplies to bring your dream card deck to life. Don’t forget to check out our article on how to incorporate dream cards into your tarot practice for additional insights and inspiration while designing your deck.
3. Gather Art Supplies
When it comes to creating your own dream card deck, gathering the right art supplies is crucial. Here’s a list of essential supplies you’ll need to get started:
- Cardstock or Paper: Choose a sturdy cardstock or paper that is suitable for the size of your cards. This will ensure that your cards are durable and long-lasting.
- Drawing Instruments: Have a variety of drawing instruments on hand, such as pencils, pens, markers, and colored pencils. These will allow you to sketch and add vibrant colors to your cards.
- Paints and Brushes: If you prefer working with paints, gather acrylic or watercolor paints along with brushes of different sizes. Experiment with different painting techniques to bring your cards to life.
- Collage Materials: Consider incorporating collage elements into your cards. Collect magazines, old books, or printed images that align with your theme or concept. You can cut out and glue these images onto your cards for added depth and symbolism.
- Decorative Materials: Explore decorative materials like glitter, metallic pens, sequins, or ribbons. These embellishments can add a touch of magic and uniqueness to your cards.
- Adhesive and Scissors: Make sure to have adhesive, such as glue or tape, and a pair of scissors handy for attaching collage elements and trimming your cards to the desired size.
- Clear Sealant or Laminating Sheets: To protect your finished cards from wear and tear, consider using a clear sealant or laminating sheets. This will preserve your art and allow you to handle the cards without worrying about damage.
By gathering these art supplies, you’ll have everything you need to bring your dream card deck to life. Now, let’s move on to the next step in creating your deck, which is sketching and designing your cards.
4. Sketch and Design Your Cards
When it comes to sketching and designing your dream card deck, the possibilities are endless. This is where your creativity truly shines. Start by sketching out your card designs on blank cards or paper. Allow yourself to explore different layouts, symbols, and imagery that align with your chosen theme or concept. Consider the colors and shapes that resonate with you and the message you want the card to convey. Experiment with various artistic styles, whether it be realistic, abstract, or a combination of both. Remember, there are no right or wrong answers here. Let your intuition guide you and trust your artistic instincts.
Once you have your initial sketches, refine them to bring your vision to life. Add details, shading, and textures to make the designs more visually appealing. Consider incorporating elements of symmetry or balance to create aesthetically pleasing compositions. Don’t be afraid to go back and make revisions if something doesn’t feel quite right. It’s all part of the creative process.
If you’re not confident in your drawing abilities, don’t worry! You can also use computer software or collage techniques to design your cards. Cut out images from magazines or print out pictures that align with your theme, and arrange them on the card to create a collage effect. You can then add your own touches by drawing or painting on top of the collaged images.
Remember, the goal is to create cards that resonate with you and evoke the intended emotions and meanings. Each card should feel like a piece of art that tells a story. So, take your time, enjoy the process, and let your imagination run wild as you sketch and design your dream card deck.
5. Add Symbolism and Meaning
When adding symbolism and meaning to your dream card deck, there are several important considerations to keep in mind:
- Research Symbolism: Conduct thorough research on symbols and their meanings that resonate with you and align with the theme or concept of your deck. Look into cultural, spiritual, and personal symbols that hold significance for you and reflect the message you want your cards to convey.
- Incorporate Universal Symbols: Include universal symbols that hold collective meaning and are widely recognized. These symbols can help create a bridge between your personal interpretation and the interpretations of others. Examples of universal symbols include the sun, moon, stars, animals, elements, and geometric shapes.
- Infuse Personal Symbols: Integrate symbols and imagery that hold personal meaning for you. These can be objects, places, or experiences that have had a profound impact on your life. By including personal symbols, your dream card deck becomes even more intimate and meaningful to you.
- Consider Color Symbolism: Colors can convey emotions, energies, and themes. Research color symbolism and choose colors that complement the symbolism of your cards. For example, red can represent passion or intensity, while blue can represent calmness or spirituality. Use colors purposefully to enhance the depth and impact of your card meanings.
- Create Symbolic Associations: Connect your symbols to specific themes or intentions. Develop a system of symbolic associations that provide a framework for interpretation. For instance, you may associate a tree with growth and renewal, or a key with unlocking hidden truths. These associations add layers of meaning to your cards and deepen their interpretive potential.
By adding symbolism and meaning to your dream card deck, you infuse it with depth and significance. The symbols you choose will enhance the way you interpret the cards and allow for a more profound connection with your intuition. With symbolism in place, you are ready to move on to the next step of selecting a method for coloration.
6. Select a Method for Coloration
When it comes to selecting a method for coloration in your dream card deck, there are a few options to consider. Each method offers a unique approach to adding color to your cards. Here are some popular methods to choose from:
- Watercolor: Using watercolors can add a soft and ethereal quality to your cards. It allows for blending and layering of colors, creating a depth and richness in your designs. Watercolors are versatile and can create different effects based on the amount of water used.
- Colored Pencils: Colored pencils provide a great level of control and precision. They allow you to build up layers of color, shading, and details. Colored pencils are ideal for intricate designs and fine lines. They also offer a wide range of vibrant and muted colors to choose from.
- Markers: Markers can give your dream card deck a vibrant and bold appearance. They have a smooth and consistent flow of ink, making it easy to create solid blocks of color or gradient effects. Markers are quick-drying, allowing you to work efficiently.
- Ink Wash: Using an ink wash technique can add a dynamic and expressive quality to your cards. It involves diluting ink with water to create different shades and textures. Ink washes can create a sense of movement and depth, making your dream cards visually captivating.
- Mixed Media: Consider combining different methods mentioned above or experimenting with additional materials, such as acrylic paints, pastels, or even collage elements. Mixed media allows for a wide range of textures, colors, and effects, giving your dream card deck a unique and eclectic look.
When selecting a method for coloration, choose the one that resonates with your vision for the deck and aligns with your artistic preferences. Remember to take your time and experiment with different techniques to find the one that brings your dream card deck to life. Once you have added color to your cards, it’s time to move on to the next step – protecting and enhancing your creations.
7. Protect and Enhance Your Cards
Once you have completed the design and coloring of your dream card deck, it’s essential to protect and enhance your cards to ensure their longevity and usability. Here are some tips to help you in this process:
- Coating: Consider applying a protective coating to your cards, such as a clear varnish or laminate. This will help prevent the cards from getting damaged due to wear and tear.
- Laminating: If you have access to a laminating machine, you can laminate each card individually. This adds an extra layer of protection from spills, dirt, and tearing. Plus, it gives your cards a professional finish.
- Storage: Find a suitable storage solution for your dream card deck. Consider using a sturdy box or a fabric bag to keep your cards safe from dust, sunlight, and moisture.
- Cleansing: Regularly cleanse and energetically recharge your cards to maintain their vibrancy and accuracy. You can do this by using cleansing methods such as smudging with sage, using crystals, or placing the cards in moonlight.
- Guidebook: Create a guidebook or journal to accompany your dream card deck. This can include written interpretations, personal notes, and any additional information that will enhance your understanding of the cards.
- Continued Exploration: As you continue using your dream card deck, you may discover new ways to enhance and protect your cards. Stay open to experimenting with different techniques and materials to find what works best for you.
By taking these measures to protect and enhance your cards, you ensure that they remain in optimal condition for repeated use and interpretation. Now that you’ve learned how to create, interpret, and care for your dream card deck, you can fully utilize its power and unique insight. In the next section, we will explore how to effectively utilize your dream card deck for interpretation.
Using Your Dream Card Deck for Interpretation
Once you have created your dream card deck, it’s time to dive into the exciting process of using it for interpretation. Here are the key steps to get started:
- Getting to Know Your Deck: Before you begin interpreting the cards, take some time to familiarize yourself with your deck. Study each card’s imagery, symbolism, and meanings. Pay attention to the unique characteristics and connections you have infused into the deck during its creation process. This will help you develop a deeper understanding of your cards.
- Building a Connection: Establishing a strong connection with your dream card deck is essential for accurate interpretations. Start by handling the cards regularly, shuffling them, and even meditating with them. This helps to align your energy with the cards and establishes a rapport between you and the deck. The more you interact with your deck, the stronger the connection will become.
- Interpreting the Cards: When interpreting the cards from your dream card deck, it’s important to trust your intuition and rely on the symbolism and meanings you have assigned to each card during the creation process. Look for patterns, themes, and connections between the cards. Consider the imagery, colors, and symbols depicted on each card and how they relate to the question or situation at hand. Trust yourself and let the cards guide you.
Remember, your dream card deck is a tool that reflects your unique perspective, intuition, and creativity. The more you work with it, the more attuned you will become to its messages and the more accurate your interpretations will be. Enjoy the process and embrace the insights your dream card deck has to offer you.
1. Getting to Know Your Deck
Once you have created your dream card deck, it’s important to take the time to get to know each card individually. Here are some steps to help you familiarize yourself with your deck:
- Study the Cards: Take some time to study each card in your deck. Observe the artwork, symbols, and colors used. Pay attention to the details and let yourself connect with the energy of each card.
- Read the Guidebook: If you have created a guidebook for your deck, refer to it for additional insights. The guidebook can provide meanings and interpretations associated with each card, helping you establish a baseline understanding.
- Practice Daily Draws: Pull a card each day and spend some time reflecting on its meaning. Consider how the message of the card applies to your current situation or mindset. This daily practice will further deepen your relationship with the deck.
- Journaling: Keep a journal dedicated to your dream card deck. Document your interpretations, personal experiences, and any intuitive insights that arise during your interactions with the cards. This will help you track your progress and gain a deeper understanding of the symbolism and meaning.
- Experiment and Explore: Don’t be afraid to experiment with different spreads and reading techniques. Explore the unique aspects of your deck and find what works best for you. Trust your intuition and allow your connection with the cards to grow organically.
By taking the time to get to know your deck, you’ll develop a strong bond with the cards, allowing you to interpret them with confidence and accuracy. Next, we’ll dive into building a deeper connection with your dream card deck.
2. Building a Connection
Building a connection with your dream card deck is an essential step in unlocking its full potential. Here are some strategies to help you establish a deep and meaningful bond:
- Spend Time with Your Deck: Dedicate regular, uninterrupted time to interact with your dream card deck. This can be through shuffling and handling the cards, or simply gazing at the imagery. As you immerse yourself in the cards, you’ll begin to develop a sense of familiarity and kinship.
- Set an Intention: Before each session, take a moment to set an intention for your dreams and the guidance you seek. Verbalize or visualize your intentions clearly, and ask your dream card deck to provide insight and clarity. This act of intention setting helps establish a focused and purposeful connection.
- Meditate with the Cards: Find a quiet and peaceful space where you can comfortably meditate. Select a dream card that stands out to you or resonates with your current situation or question. Place the card in front of you and enter a meditative state. Allow the symbolism of the card to unfold and connect with your inner wisdom.
- Journaling and Reflection: After each dream card reading, take the time to journal or reflect on your impressions, insights, and emotions. Documenting your experiences and observations helps to solidify the connection between you and the cards. It also provides a reference point for future interpretations and growth.
Building a connection with your dream card deck is an ongoing process. The more time and energy you invest in understanding and communing with your cards, the stronger and more intuitive your connection will become. This deep bond will ultimately enhance your ability to interpret the messages and guidance that the dream card deck offers.
3. Interpreting the Cards
When it comes to interpreting the cards in your dream card deck, it’s essential to approach each card with an open mind and trust your intuition. Here are some tips to help you effectively interpret the cards:
1. Study the Symbolism: Take the time to familiarize yourself with the symbols and imagery on each card. Pay attention to details, colors, and shapes, as they can convey different meanings. Use your own personal associations with these symbols as a guide in understanding their significance in relation to your dreams and the questions at hand.
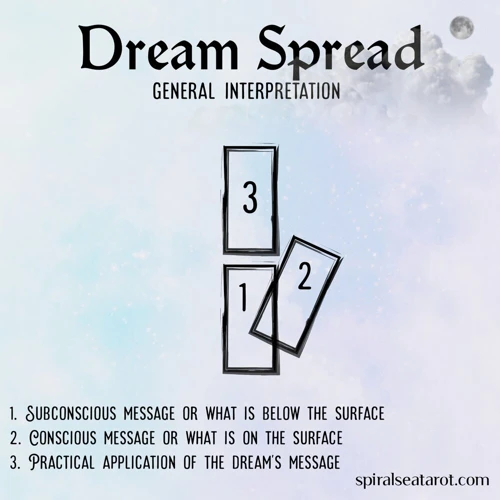
2. Consider Card Placement: The placement of a card in a spread can also influence its interpretation. A card’s position can indicate the past, present, or future, or reveal different aspects of a situation. Take note of the surrounding cards and how they interact with each other, as this can provide additional insights and layers of meaning.
3. Trust Your Intuition: Your intuition is a powerful tool when it comes to interpreting the cards. Listen to your inner voice and allow your intuition to guide you. Pay attention to any immediate thoughts, feelings, or impressions that arise when you look at a particular card. These intuitive insights can often reveal deeper truths and guidance.
4. Keep a Journal: Maintaining a journal of your interpretations and experiences with your dream card deck can be highly beneficial. Write down your initial thoughts, emotions, and any synchronicities that occur during your practice. Over time, you’ll develop a deeper understanding of the cards and their meanings, allowing you to build a personal relationship with your deck.
5. Seek Guidance when Needed: If you find yourself struggling to interpret a card or unsure of its meaning, don’t hesitate to seek guidance from reputable sources or experienced practitioners. Books, online resources, or even joining a dream card interpretation community can provide valuable insights and perspectives.
Remember, interpretation is a highly individual and subjective process. Trust yourself and embrace the unique insights that come from working with your own dream card deck. With time and practice, your interpretations will become more nuanced, insightful, and aligned with your personal journey.
Tips and Tricks for a Successful Experience
When creating your own dream card deck for interpretation, there are several tips and tricks that can help ensure a successful and enjoyable experience. Here are some key suggestions to keep in mind:
1. Plan and Research: Before diving into the creation process, take some time to plan and research different themes, symbols, and card layouts. This will help you create a deck that aligns with your intentions and desires.
2. Experiment and Explore: Don’t be afraid to experiment with different art supplies, techniques, and card sizes. Allow yourself to explore different options and find what works best for you. This can add an element of excitement and discovery to the process.
3. Focus on Consistency: While each card can have its own unique symbolism, it’s important to maintain consistency in terms of style, color scheme, and overall design. This will ensure that your deck appears cohesive and visually pleasing.
4. Test and Revise: Once you’ve completed your dream card deck, take some time to test and revise it. Use your deck for personal readings, practice interpretations, and seek feedback from trusted individuals. This will help you refine your deck and make any necessary adjustments.
5. Connect Emotionally: As you use your dream card deck, focus on building an emotional connection with the cards. Take the time to meditate with them, perform rituals, or even sleep with your deck under your pillow. This emotional connection can deepen your interpretations and enhance your intuitive abilities.
6. Continued Learning: Remember that creating your own dream card deck is not the end of the journey, but rather the beginning. Continue to learn and expand your knowledge of dream symbols, card meanings, and interpretation techniques. This ongoing learning process will further enrich your experience with your deck.
By implementing these tips and tricks, you can create a dream card deck that not only reflects your personal style and intentions but also serves as a powerful tool for interpretation. Embrace the process, stay open to new ideas, and enjoy the journey of creating and using your very own dream card deck.
Conclusion
In conclusion, creating your own dream card deck for interpretation can be a fulfilling and transformative experience. By personalizing the cards and infusing them with your own energy, you establish a deeper connection and resonance with the deck. This connection enhances your ability to interpret the cards accurately and intuitively, allowing for a more meaningful and insightful experience.
Designing your dream card deck also offers a platform for artistic expression and creativity. You have the opportunity to explore different symbols, colors, and designs that reflect your unique style and preferences. This artistic process not only brings joy and satisfaction but also adds depth and layers of meaning to the cards.
Furthermore, creating your own dream card deck allows you to incorporate symbolism that holds personal significance. Your chosen symbols become tools for tapping into your intuition and unlocking deeper insights. This adds richness and depth to your interpretations, enabling you to explore the nuanced meanings hidden within each card.
So, whether you are an experienced interpreter or just starting on your journey, consider embarking on the adventure of creating your own dream card deck. Embrace the opportunity for personalization, artistic expression, and intuitive connection that it offers. Unlock the secrets of your subconscious, and let your dream card deck guide you on a path of self-discovery and deeper understanding.
If you’re eager to dive deeper into the world of dream card interpretation, check out our articles on interpreting recurring symbols in dream cards, how to incorporate dream cards into tarot readings, and tips and tricks for successful dream card interpretation. These resources will provide you with additional insights and guidance to enhance your interpretation practice.
Frequently Asked Questions
1. Can I use any type of cards for creating my dream card deck?
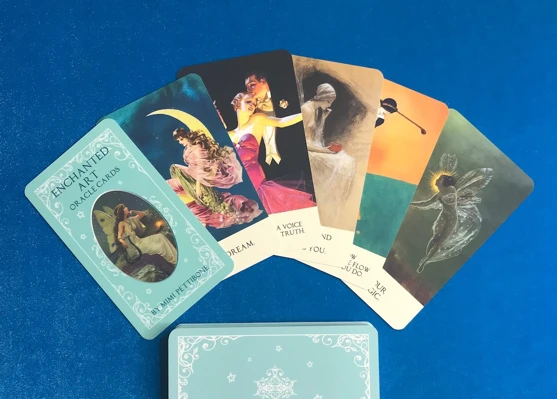
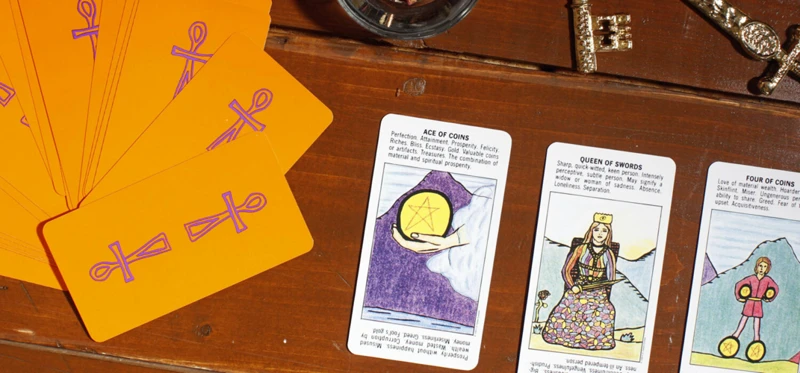
Yes, you can use different types of cards for your dream card deck. Some popular options include tarot cards, oracle cards, or even creating your own unique cards from scratch.
2. How many cards should I include in my dream card deck?
The number of cards in your dream card deck can vary based on your preference. While traditional tarot decks typically have 78 cards, you can choose to have a smaller or larger number depending on the depth and complexity you desire.
3. Do I need to be an artist to create my own dream card deck?
No, you don’t need to be an artist to create your dream card deck. The beauty of this process is that it allows for self-expression, regardless of artistic skills. Focus on conveying your intentions and personal symbolism through your creations.
4. How do I choose a theme or concept for my dream card deck?
Consider your interests, passions, or specific areas you’d like to explore. You can choose themes like nature, astrology, dreams, or any subject that resonates with you. Your theme should be something that ignites your curiosity and sparks your imagination.
5. What art supplies do I need to create my dream card deck?
The art supplies you’ll need depend on your chosen medium. Common supplies include paper or cardstock, pencils or pens, markers or paints, and any additional tools or materials you prefer to work with, such as brushes or collage materials.
6. How can I add symbolism and meaning to my dream card deck?
Think about the specific symbols, colors, and imagery that hold personal significance for you. Research the meanings behind different symbols and incorporate them into your card designs. Trust your intuition and allow your subconscious to guide you.
7. Can I use digital tools to create my dream card deck?
Absolutely! If you’re comfortable using digital tools, you can create your dream card deck digitally. There are various software applications and online platforms available that provide templates, graphics, and editing options.
8. How can I protect and enhance my completed dream card deck?
You can protect your dream card deck by laminating the cards or using card sleeves. This helps to preserve their quality and prevent wear and tear. To enhance your deck, you might consider adding a guidebook or journal to accompany the cards, providing interpretations and exercises for deeper exploration.
9. Can I incorporate my dream card deck into my daily practice?
Absolutely! You can incorporate your dream card deck into your regular ritual or meditation practice. Pull a card each day and reflect on its message. You can also use the deck for journaling, self-reflection, or as a tool for intuitive guidance.
10. How do I interpret the cards in my dream card deck?
Interpretation comes from a combination of intuition, personal symbolism, and your understanding of the card’s traditional meanings (if applicable). Take time to study each card, make connections between symbols and themes, and trust your instincts when exploring their messages.